Saturday, September 10, 2011

Herb Garden Designs Through Experimentation

Herb Garden Designs
Herb gardening is undertaken by both the urban dweller with room sufficient only for a windowsill planter... to the gardener who has both the time and land for more ambitious endeavors.

There are quite a few options we are going to explore if you are up to the challenge of devoting time to maintaining a larger herb garden design.

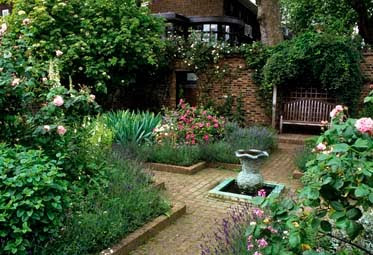
For example, the formal garden which has its roots in classical design and architecture first arose to prominence as the embodiment of our supremacy over nature by bending and sculpting horticulture into balanced designs.

Your formal garden concept should be a well-balanced thought out design with herbs intermixed among shrubs, flowers and trees. Typically a formal garden will be the focus viewed from key windows of the home. The herb garden contributes to the look of the garden but serves a different function.

Decorative paving and/or sculptures add extra splendor to the use of your formal herb garden design. Some of the most vivid examples of these types of gardens can be found in European gardens where they were first cultivated.

Varying heights of hedges is one of the key features in a formal garden. However it must be balanced proportionately with attention to angles that employ a variety of shapes such as ovals, ellipses, squares and other non-traditional shapes.

Another great herb garden design is the color themed garden. This is an artistic way to give your garden an explosion of color. Some theme gardens concentrate solely on single shades while others are a riotous cornucopia of bold colors.

Ground cover herbs are ideal for use in themed gardens as well. These low growing plants provide texture to the landscape and fills in gaps or hard to plant areas that need more color and volume. And for those singular spots such along stone steps, in-between flagstone or at the base of trees, ground cover herbs fit the bill.

Some of the best choices of flowering herbs are the common lady's mantle, soapwort, roman chamomile, creeping golden marjoram, Aztec sweet herb, bee balm, and lavender.

Do not over think your color themed garden. Keep in mind that some of the most splendid concepts are those that rely on atypical groupings of color.

Your last consideration is planting herbs as companion plants. These are herbs planted in flower and vegetable gardens where each plant benefits from the presence of the other.

Case in point, garlic deters a variety of garden pests and assists with the flowering of other plants. Basil entices bees which in turn pollinate tomatoes. Chives which are usually grown in a border area to help arrest black spot which is a very common disease which attacks roses in particular.

Many herbs such as yarrow, coriander, dill and rosemary provide welcoming terrain for helpful insects both parasitic and predatory that assist in keeping others of the pest population within control.

Herb garden designs are only limited by your imagination. If you can conceive it and it fits your needs, there are no restrictions. Sometimes experimentation is needed to create an herb garden that fits your specific needs.

Joel & Ara'Bella are herbal experts. For more information on herb garden design visit http://www.herbgardeningcare.com/.
New Garden Designs

 Garden Designs
We believe that Aquaponics should be at the heart of any new urban, patio or garden design.

Gardens with 'use' are becoming increasingly popular. Technology is improving which means that our gardens have greater potential to have a particular use.

Aquaponics means the growing of fish and plants together which can be done in a compact and efficient manner. No soil is used and you will not have to feed the plants or water them.

Aquaponics combines aquaculture (fish farming) and hydroponic (growing plants without soil). In aquaponics, the nutrient-rich water that is produced by raising fish (to eat or admire) provides a source of natural fertiliser for the growing plants. When the plants take up the nutrients, they purify the water that the fish live in. This creates a sustainable micro ecosystem where both plants and fish can thrive. Aquaponics is widely regarded as the most efficient form of gardening known. The benefits are as follows:

Systems are compact and efficient and are therefore ideal for homegrown food production.

No weeding, pesticides or fertilizers are required

They are completely natural and organic

Plants and fish grow rapidly

Uses less that 10% of the water required for conventional gardening

They make gardening available to a wide range of people who may have found it difficult due to urban environments, disabled etc.

They are innovative and creative and therefore generally appealing.

This means that you can create amazing concepts which involve fish (to admire or to eat) and plants at the same time. Its the perfect roof top gardening system. It lends itself equally to the commercial grower as it does to someone who only has a small patio.

Aquaponic systems have a number of advantages which means that they will become an increasing part of new garden designs in the UK. They are compact, they don't use soil, they are organic, they use only 10% of the water normally used in gardening and they don't use fertiliser or pesticides.

They pretty much run themselves to. Apart from feeding the fish and picking the plants there really is not much more you need to do with them. Because the system waters and feeds itself the plants grow amazingly well - much faster than normal gardens.

It will be up to the designers to consider how they incorporate the systems but they will have fun doing so. If you need any further advice or suggestion please do not hesitate to contact us

http://www.aquaponicworld.com

Saturday, August 20, 2011

Garden Edging Techniques - Creating Beautiful Landscape Designs With Edging


Garden edging is a great way to make your landscape designs pop. You can achieve many clean and decorative looks with various edging techniques. Garden edging will open up a world of landscape design opportunities in your yard because you can choose from a multitude of designs, edging materials, and edging techniques.

If you are not familiar with edging, it is a term used to describe a landscaping technique used to create "edges" around various landscape elements. You can place an edge around trees, shrubs, flowers, and hardscape elements like light posts and mailboxes. Creating an edge around elements in a landscape gives them a clean look and sets them apart from other elements in the yard.

Depending on the style you want to achieve with this technique you might want to choose certain materials over others. For example, cement can give a more modern look and brick can be used to create a more traditional look. Stone and brick are the easiest materials for homeowners to work with on their own. To begin you can try any one of these simple but beautiful techniques that use stone and brick.

Boulder Technique -- This is a very simple landscaping technique to start with. All you need are large sized rocks. Anywhere from 8 inches to a foot in height. Then you place them around your selected garden bed. You can use rocks that slightly vary in shape and color. This technique gives gardens an organic look.

Flagstone Technique -- Flagstone is a popular stone to use in landscapes. It has a distinctive look that most people recognize--a flat, wide surface with uneven edges. Because it is so flat it should be placed in small stacks to give it height. To create a simple edging with flagstone, take small stacks of the stone and place them side-by-side around a garden bed.

Diagonal Brick -- This landscaping idea gives a beautiful old-world look to landscapes. You can create the diagonal brick look by building a small trench around a select garden bed (minding plant roots, of course). Then, set your bricks in the trench so that they are laying on top of each other at a diagonal angle. Fill the trench back up so that most of each brick is covered. When you are done it should look like there are little pyramids of brick sticking out of the ground in a row.

You can create garden edging on your own or you can consult with a residential landscape designer who can create edging designs for you. However, creating your own beautiful edging only requires that you have an eye for detail, a steady hand, and a few materials. You can literally edge with anything that inspires you (sea shells, old bottles, etc.), but some traditional garden edging materials include wood, metal, brick, stone, cement, plastic, and aluminum. You can find pre-made edging materials at your local home improvement store that can easily be put together. You can also buy brick or any variety of stone to create you edging. This is most common. Professional landscape designers typically create cement edges but you can also buy pre-cast cement or faux cement edges that are easy to put together.

For help with your landscape design you should contact professional Phoenix landscapers for expert tips and advice. Professional assistance is especially useful from Phoenix landscaping professionals because the desert can present many challenges to homeowners. No matter what type of landscape you have a professional landscape designer can help you create the landscape of your dreams.

Bamboo Edging - The Perfect Addition to Any Yard


There are many benefits choosing bamboo edging for your next landscaping project. Bamboo is considered an eco-friendly building material for many projects. It offers a very lightweight paired with excellent strength. It would be an attractive addition to any garden.

Bamboo is a fast growing grass that is hardy and resilient. The speed of its growth makes it a renewable source of building or landscape material. Harvested bamboo can completely re-grow in as little as three years. While there are many options for landscape material using different types of wood; only bamboo can make the claim of being a renewable source.

The lightweight of bamboo makes it very easy to work with in the garden. This feature makes it easy to move around in the yard and even easier to install. One section of edging four feet long and twelve inches tall will weigh less than eight pounds.

Bamboo features the tensile strength of steel and the compressive strength of concrete. This makes it an excellent choice for keeping your plants contained in the garden or preventing grass from taking over your sidewalk. Bamboo is also mold resistant, moisture resistant and is not prone to drying out. These features make it an excellent, durable choice for most landscaping projects.

Bamboo edging is constructed by connecting lengths of bamboo side by side using wire. These tubes are then capped to help the interior section stay dry and maintain the strength and durability of the fence. The fencing can be constructed so all the tubes are the same height, typically 12" tall. It is also available in staggered sections with the fencing sections ranging in height from 8" to 12". Edging is available in a natural, light tan finish or a darker, speckled finish. The finish has a glossy appearance that is very attractive in gardens and landscaping.

This edging can be purchased through larger retailers like Home Depot and Lowe's. It can be found at local hardware stores. A keyword search online will yield dozens of retailers offering bamboo edging at very reasonable prices. The lightweight will also help keep shipping costs low if you choose to order your edging and have it shipped.

Bamboo edging can be used for many different projects in your yard. Fences and driveways can be neatly and attractively lined using it. The borders of your flower beds can be more clearly defined. Ground covers can be effectively contained behind this edging. Whatever project you use bamboo edging on you are sure to be pleased with the attractive appearance and the durability of the edging.

For more landscaping edging ideas, please be sure to visit http://www.landscapeedgingart.com today.

Friday, July 22, 2011

LED Grow Lights Vs HPS - Deciding On The Right One


Finding the right grow light system for an indoor garden is not as simple as it may first appear. A person has a wide range of choices when it comes to choosing a indoor system set up for their plants. A common choice for many individuals boils down to LED lights vs. HPS. LEDs, or light emitting diodes, have not been around very long and many people may not understand some of the advantages that come from them. On the other hand, HPS, or high-pressure sodium bulbs, are popular with many indoor gardening enthusiasts. The LED light panels vs. HPS debate often comes down to a couple of key factors.

One of the important determining factors when it comes to choosing LED grow panels vs. HPS is the fact that LEDs cost significantly more than high-pressure sodium bulbs. The price difference can be quite large, especially if a person needs a large lighting system set up for a big indoor garden. Before ruling LEDs out completely, however, a person should consider the entire cost of ownership rather than just the initial purchase price. If purchase price alone was the determining factor, the LED grow panels vs. HPS debate would be an easy one.


Because LEDs use only a fraction of the energy required by high-pressure sodium bulbs, they can be much more cost effective in the long run. It is also important to keep life span in mind when choosing between LED grow lights vs. HPS. Although high-pressure sodium bulbs have a decent life span, they simply cannot compare to how long LEDs last. Cheaper energy bills and fewer replacements may make it easy to choose between LED grow lights vs. HPS. A final important factor to keep in mind when choosing between LED grow lights vs. HPS is the amount of heat put out by the bulbs.

If an individual is growing plants in a cool area such as a basement then high-pressure sodium bulbs may be the best choice. However, because of the heat put out by HPS bulbs, they can dry out or scorch plants. If a cool running light is important then the LED grow lights vs. HPS question is an easy one. A person choosing between LED grow lights vs. HPS should also keep in mind that it may be necessary to add some kind of ventilation to the area if they choose high-pressure sodium bulbs.

To learn more about a LED Grow Lights vs. HPS, please visit http://www.growlightsupply.com

The Benefits of Raised Garden Beds


Building raised garden beds is a great way for new gardeners to get their fingers green for the first time. Easier to manage than traditional beds, raised beds allow you to carry out all of your gardening from the safety of the lawn, or garden path - without having to worry about compressing the soil of your flowerbed underfoot. This can compact the earth around your plants' roots, reducing their contact with the air they need in order to grow.

The earth used in a raised garden bed should be a mixture of soil and compost, removing the complication of 'bad dirt' from your gardening - a problem which faces many gardeners in urban areas. Water drainage is more effective with raised bed gardening, which again, allows plants to breathe easier.

In some areas of the world, such as South America, where the soil saturation is extremely high, raised bed gardening is often the only way you can grow many types of plants.

Plants can be placed closer together, thanks to the improved drainage and aeration raised garden beds can offer, which allows for a greater population of sprouts (and reduced weed growth) in a smaller area. Studies have shown that elevated garden beds can yield between 1.4 and 2 times as many flowers or vegetables as traditional beds.

Resist the urge to overcrowd your seeds, however. Although in a raised garden bed you don't need to allow for places to step while gardening, concentrating too many seeds in a small area will harm your plants' growth.

Apart from the obvious advantage of bringing your garden to you, and reducing the need to bend down when planting, weeding and harvesting, raised garden beds let you manage your sprouts' water, fertiliser and compost more effectively. Nutrition can be directed where necessary, and varied from bed to bed.

Before I began gardening in raised beds, I would suffer terrible bad backs the following day, as a result of bending over a bush for hours on end. Since I built my elevated beds my back hasn't given me any trouble at all.

A carefully designed and well-kept raised planter can perk up even the most drab garden. Raised beds can be made into a shape of your choosing, making them decorative as well as highly functional alternatives to traditional bed gardening. Whether you're a master planter, or a green-fingered green-horn, raised garden beds make a wonderful addition to your garden or allotment.

Gardening can have a lot of benefits for your health and is a great pastime. If you are interested in finding out more about raised garden beds then why not visit http://www.thegardeningwebsite.co.uk?

Slugs in the Home Vegetable Garden


When I say slugs in the home vegetable garden I am not talking about the crabby old man around the corner that constantly wants your fresh fruits and veggies. I am talking about that annoying shell lacking gastropod mollusk that wreaks havoc on the plants you are growing.

Slugs will eat just about everything you grow in the garden and the carnage they leave behind to look at isn't pretty. Who would think something so small could be so bad right? Well they are.

Slugs thrive in areas where there is plenty of moisture. Some common areas would be in gardens that have plenty of mulch or under potted plants that get regular waterings and areas of the garden that have become overgrown.

Predators to slugs make for great slug control however for many home vegetable gardeners attracting such predators may be too time consuming or near impossible. If you are lucky enough to attract some toads then you are business, but for me, in the suburbs, it doesn't work out too well.

If obtaining some predators is not a viable option then one method that has worked well for many is putting out a tin pan filled with beer. Yeah I know, such a waste of a good drink, but this method truly works. It attracts the slugs and they eventually drown in it.

Another method that works great that I picked up from my grandfather many years ago was pouring salt on them. Since slugs need moisture, the salt dries them out, killing them. This method works well when you can get right at them and pour the salt directly. It doesn't work so well when you blindly dump salt in areas that may or may not have slugs.

Along with beer traps and salt, diatomaceous earth, crushed egg shells, coffee grounds and copper also make for great slug deterrents.

As one friend of mine said previously, `if you have a vegetable garden, you have slugs`. This statement rings true. If you don't have slugs consider yourself lucky or your vegetable garden underwatered, but that's a topic for a whole other conversation.

Some facts about slugs you may not have known and that is some slugs are predators and will eat other slugs, they do a great job of "cleaning" the environment by eating dead leaves and the majority of slugs are absolutely harmless to humans.

Also, Frogs, toads, snakes, hedgehogs, Salamanders, eastern box turtles, rats, Caecilians and also some birds and beetles are slug predators. So if you have a few of these around, your home vegetable garden will be in good shape.

About the Author
Mike Podlesny is the owner of Mike the Gardener Enterprises, LLC, the exclusive home for the Seeds of the Month Club, which has appeared on NBC, ABC and MSN Money as a great way for consumers to save money.

Sunday, June 12, 2011

Basic Gardening Tips for Beginners

You've decided to plant a garden but you need basic gardening tips for beginners, this is the place to be. Gardening has become a delightful hobby for people all over the world.

There are many rewards for the gardener, the visuals of his creation, the scent of the blooms, great fresh air and lots of exercise. Imagine a weekend spent in the yard with your feet up drinking in the spectacular gardens that you have created the fruits of your labor and love. If you are a beginner gardener, here are some basic gardening tips. No matter how much room you have, you can create a masterpiece garden.

The basic garden tips for beginners will help you create new gardens and make it a successful and joyful experience. In the beginning go slowly, start small but use your imagination. Choose a project that will not take a long time to complete. If it takes you weeks to finish a project you will get frustrated and start to hate the project you wanted to enjoy. Even if you have 75 or 100 square feet you will be amazed at how much you can plant.

If you are determined to have a larger project, then work in sections and turn your attention to one area at a time. This way as each section is finished you can enjoy that completed job. This will also build up your confidence as you go along making the next section not so daunting.

But for a beginner gardener a small scale garden is optimal. You are going to have to learn the basics of gardening, all about disease, the best way to control weeds and pests, the all important watering and when and how to fertilize. After your initial project you can enlarge the garden or plant one somewhere else in your yard with your new found confidence.

To cut down on the weeding of your garden, place mulch around the plants. This serves three purposes; it cuts down on weeding, as well as aiding in temperature control and water retention. Granted there are some gardeners that love to work the soil and weed the plants but it would be more rewarding to tending to the plants or just watching them grow. To maintain really healthy plants water for longer periods of time but less frequently. Do not let the plants dry out. Always water early in the morning so the plant leaves have time to dry out during the day which helps prevent fungal disease.

After planting, try to have your garden remain pesticide free. An especially good natural deterrent is as follows:

In a jar, combine 1 teaspoon dishwashing liquid and 1 cup vegetable oil. Shake vigorously. In an empty spray bottle, combine 2 teaspoons of this mixture and 1 cup water. Use at ten-day intervals (or more often if needed) to rid plants of whiteflies, mites, aphids, scales, and other pests.

These are the basic gardening tips for beginners. Remember, that you can create lovely gardens in containers which you can move around as you please. There are hundreds of different plant combinations and containers that you can use for a container garden. So, if you are an apartment or condo dweller, you can plant lovely gardens on your balcony or patio. The basic tip here is that container gardens will dry out much faster than the plants in the ground so be vigilant about checking them for moisture.

Happy Gardening And Good Luck!

Copyright © Mary Hanna, All Rights Reserved.

This article may be distributed freely on your website and in your ezines, as long as this entire article, copyright notice, links and the resource box are unchanged.

Mary Hanna is an aspiring herbalist who lives in Central Florida. This allows her to grow gardens inside and outside year round. She has published other articles on Cruising, Gardening and Cooking. Visit her websites at Gardening Landscaping Tips, Gardening Outside, and Herb Gardening

Wednesday, June 8, 2011

Delicious Ground Cover Or Edging Plants For the Edible Garden Landscape

There's no reason to settle for the old standbys when it comes to ground covers and edging plants for your landscape. When you take the edible garden landscaping approach, a wide variety of delicious plants is available to fill your yard's need for a ground cover as well as edging plants. Use herbs, fruits and even vegetables to create a beautiful cover that you'll also enjoy in your kitchen. Here are just a few ideas that could work in your garden landscape.

Herbs

Wintergreen (Gaultheria procumbens) is an aromatic evergreen ground cover that grows no more than six inches in height. Drooping white flowers are followed by edible red berries also know as tea berries. However, the leaves are used most often for flavoring. Varieties available for hardiness zones 3-8.

Garden Thyme (Thymus vulgaris) is a perennial herb that grows 4-8 inches tall. It should be planted in full sun. The leaves can be used fresh any time and leaves can be dried for later use. A number of varieties are available for hardiness zones 4-9.

Greek Oregano (Origanum heracleoticum) is the type of oregano most often associated with cooking. It is a perennial that grows 8-12 inches tall, if it is regularly harvested; but it could grow up to 30 inches tall, if not managed. Cutting stems all the way back to the ground will encourage more stems and a fuller plant. Oregano does best in well-drained soil in full sun and is hardy in Zones 5-9.

Fruits

Strawberries can grow 6-12 inches high and some varieties are hardy all the way to Zone 2 if they are covered over winter. Strawberries require direct, full sunlight and light, well-drained soil. They bloom early in the spring, so don't plant them in low-lying areas of your yard where cold air gets trapped.

Low growing or "half-high" blueberries grow a bit taller than strawberries - 18-24 inches - but they make a terrific landscape plant as well as fruit producer. The University of Minnesota has developed a couple of varieties in particular that are very cold hardy making it possible for edible gardeners to grow blueberries in cold hardiness zones 3-7. They do need acidic soil and 2 or more different varieties to propagate.

Lingonberry (Vaccinium vitis-idaea)grows only a few inches high and compare to the cranberry in use, although it is smaller and if picked at the peak of ripeness can be eaten right off the plant, unlike the cranberry. Lingonberry thrives in full sun or partial shade, but if summers are hot, they do best in partial shade. They prefer very acidic, moist soil. Cold hardiness zones 4-7. Also known as foxberry, mountain cranberry, lowbush cranberry, mountain bilberry, or partridgeberry.

Vegetables

Swiss Chard has a smoother and larger leaf with a more mild flavor than spinach with the added bonus of delicious stems. There are several new varieties such as Neon & Bright Lights that also have stunning stems. Chards prefer at least 6 hours of sun per day and well-drained non-acidic soil.

Kale is another plant that can really surprise with a variety of leaf sizes, shapes, colors and textures. They have sweet tender greens that get better in cooler weather. Redbor and Winterbor both have curly leaves - Redbor's are a deep purple and Winterbor's are greenish blue. When combined they make a stunning border. This plant grows to about 12 inches, prefers part- to full-sun and sandy soils; although it does OK in some clay. Grown in hardiness zones 2-10.

Lettuce blends that combine a wide variety of shapes, textures and colors make stunning cut and come again borders. Read seed packages and plant descriptions carefully to select varieties that are slow to bolt (when the plant flowers and produces seed). If you plant in partial shade you may be even to extend the growing season even longer, particularly where temperatures get hot in summer.

These are just a few of the options for using edibles for edging or ground cover plantings. Just about any low-growing edible plant would work, use your imagination and ask questions if you're unsure. Feel free to email me at info@ediblegardenlandscaping.com. Sources: Landscaping with Fruit by Lee Reich and garden catalogs from Miller Nurseries, Cook's Garden

About the author

Greene has been gardening for more than 25 years and has focused on edible garden landscapes for the last 12. Her website, ediblegardenlandscaping.com provides information and resources to people who want to use more of their available growing space for beautiful trees, shrubs and plants that also provide a delicious, nutritious and economical food supply to the home gardener. Be sure to sign up for the Weekly Tips E-Newsletter at [http://www.ediblegardenlandscaping.com] to be the first to know when the Edible Garden Landscaping book becomes available! For quick answers to your Edible Garden Landscaping questions, email Lisa at info@ediblegardenlandscaping.com.

Lawn Edging

How do you make those flowers bloom where they are planted and not go overboard and how do you make your turf stick to its own turf and not edge into your flower beds, borders, and garden spaces? Lawn edging is the answer!

Edging bricks, lawn timbers, and treated wood edging , molded plastic edging and heavy duty plastic strips are all ways to wall in your flowers and keep weeds out of your garden and the other landscaped areas of your yard. In addition to curbing your weed problem, lawn edging also keeps mulch and decorative landscape treatments in place.

Brick edging remains a favorite method of lawn edging. Now available in many colors and pattern variations, it is an attractive, durable, and easy way to cut back on lawn chores.

If you want to dig deep into your weed problem, pressure treated wood edging or plastic strip edging is the way to go. Because these types of edgers are usually easier to bury deeper than bricks, molded plastic edgers (decorative), or wood timbers, they provide more resistance to types of invasive weeds that send out underground runners.


Of course, you can always put the action into lawn edging by trimming your lawn with an edging tool. Lawn edgers are sold in various types from spade shaped implements to those that look like saw blades on wheels. In addition to muscle powered diggers and walk-behind rolling edgers (which also take a fair amount of muscle in a dry summer!), there are many electric and gas powered appliances. Some weed trimmers also have special lawn edging attachments that keep you from chopping the shrubbery off with the weeds!

With all the variety in today's modern edging tools, appliances, and edging embellishments, it's easy to make your manicured yard a picture of perfection right up to the very edge of it!

Linda is an enthusiastic gardener, researcher and author of http://www.gardening-guides.com and http://www.lawnmower-guide.com/ at these sites you find heaps of information and the solution to most gardening and lawn issues.

Sunday, June 5, 2011

Designs For Garden Flower Beds

Various designs for garden flower beds can be applied on your garden. These designs should be carefully followed and maintained as well for better enjoyment of the garden layout. Gardens give delight to our human senses such as tasting, smelling, feeling, hearing and seeing. They give our senses the natural stimulation as we get surrounded with flowers and greenery environment. However, designing a garden can be a tedious process for any gardener since the purpose of giving delight to other people would always be there. Also, the measures of giving excitement to all our human senses would also be there as a purpose in designing our own garden.

Flower beds would always be one of the attractive portions of a garden. It makes the plantings and flower plants to appear even better. It also gives the garden a nice layout for better appearance. Flower beds are also best in segregating perennials to avoid mixtures of bordering. This scheme helps the separation of shrubs join flowers and small flowering trees for a more pleasing arrangement. Here are some helpful tips that can help you enhance your designs for garden flower beds:

(1) A wide size of flower bed is better. This is to allow the adding of graceful flowering trees and flowering shrubs that may grow as season changes. It also allows that lush and layered look for more planting opportunities. The flower beds should be at least 5-6 feet in width.

(2) Every flower bed requires a definition sense whereas a good line that will set them apart within the garden is a must. There are various lines that can be used for the flower beds. Among these lines include straight and curved lines. The straight lines give more elegance to the scene of a garden. However, the curved lines are the most preferred by some people since it gives a more elegant flower bed designs. Wiggly lines for curve lines on flower beds are not recommended since it gives a wavy pattern for the snakes.

(3) Planting in group for garden flower beds gives the impression of a well-planned garden. This idea is recommended by most garden experts to avoid jumbling look for the garden. Of course, planting in group is not recommended for those stand-alone plants that are in odd-numbered groupings.

(4) Check and monitor the height of your plants on the time that they are supposed to get tall or taller. It is best to give some tags on some plants for your reference on the next checking. In this way, you can easily monitor the change of size if needed for your garden flower beds.

(5) Create unity for your garden flower bed designs. Try to limit the colors and the sizes of the beds if possible. Make it more harmonious as well to give a more appreciating look for the garden. If needed or possible, you can put some specimens of other plants on the flower beds to make it more appealing.

Candis Reade is an accomplished niche website developer and author.

To learn more about Designs for Garden Flower Beds [http://flowerislandgarden.info/designs-for-garden-flower-beds], please visit Flower Island Garden [http://flowerislandgarden.info] for current articles and discussions.

Flower Bed Edging Ideas

If you are into gardening, you obviously know what a difference a border can make to your flower bed. It is not just about giving your garden a polished look. It is about improving visual appeal and creating your own style.

Although the edging ideas are only limited by your imagination, here are some popular ideas that you can borrow to enhance the look of your garden.

o Plants: This is the most commonly used edging. You can use plants like shrubs, perennials, flowering plants or even small trees around the border of your flower bed. The idea is to have plants that are big enough to attract attention but not so big that you would have to spend all your time pruning and maintaining them. A broad border is suitable for beds with tall flowers. You have tall edging to give your home privacy and this is more suitable for the boundaries of your garden or where there is a garden bench. You can use flowering plants like asters, geraniums, chrysanthemums or tulips to make a colorful flower bed edging. If you want a hedge-like look, then opt for herbs.

o Flagstones: Usually people use flagstones in the space between the lawn and the flower beds. This method of edging ends up giving the garden a English-garden appearance. In addition, flagstones offer an outlet for water and make mowing rather easy.

o Terracotta Tiles: You can use different colored terracotta tiles cut into decorative shapes and sizes, and bury them partially near the flower bed. You do not have worry about maintenance and at the same time end up with a novel landscaping idea.


o Bricks: You can use bricks, especially mismatched ones, to give your flower bed a domino effect. Although many people use red bricks, you can use colored ones too. This type of edging is easy to lay down and offers an easy outlet for excess drainage water from the flower bed.

About Author:
Pauline Go is an online leading expert in the gardening. She also offers top quality articles like:
Weeds in Flower Garden,
Growing Organic Vegetables

Thursday, June 2, 2011

Concrete Landscape Edging

When you are living on the suburbs, there is an ongoing competition where your front lawn says a lot about you and how well - off you are. And what would be more humiliating than a front lawn that looks like the jungle in Vietnam. So why not give it a classy and professional look. Who you would do that, you ask. Well, you could try concrete landscape edging. It has lots of benefits for your front lawn and your backyard and it would definitely save you from the trouble of being branded as a careless and untidy person. It would definitely make your flower beds look more organized, cleaner and nicer. It also provides each the sections of your lawn a neater appearance, like it is well - groomed. And the best thing about this is that you could actually do these things yourself. All you need is some effort and some few basic tools and you are ready to place edgers that would improve the entire look of your front lawn.
Concrete Landscape Edging 


First things first. You should determine the exact type of concrete landscape edging that would suit your preference. Anything that would make you feel a little bit comfortable with it. You could even pour down concrete and make a concrete landscape edging out of it. It is perhaps the easiest method of making it. You should choose from a variety of option that includes:
Concrete Landscape Edging 


  1. Straight lengths
  2. Circular lengths
  3. Curved lengths
  4. Swirled lengths

These are intended to be compatible with others so that you connect them without a problem at all. They would link together perfectly. By doing so, you would be able to create flowerbeds out of it. You could also actually pick colors that would fit your preference. Available colors are green, tan, and beige. Pick one that would perfectly fit your existing landscape.
Concrete Landscape Edging 


Next, you need to mark your borders. To do this, you need to measure it firs. You can use strings and tie it wooden sticks so that you could mark where you want to place the flower beds. For curved concrete landscape edging, try using an ordinary garden hose and lay it down according to the shape or curve that you wanted. Then use either of the following to mark the edge in which you want to place the curved concrete landscape edging"

  1. Spray Paint
  2. Flour
  3. Chalk

Now, you have to dig up some sort of trench for your concrete landscape edging. The size should be at least the same size or width as the edgers. But to be totally sure, make the trench a bit wider. Remove all the debris, rocks and other objects when you dig the trench. The bottom of the trench should be leveled using sand. Lay down the concrete landscape edging and pour a thin layer of concrete on the trench. This is to make sure that the concrete landscape edging is secured. You should lay the concrete first before the concrete landscape edging.

So now that you know how to make your own concrete landscape edging, I guess it's time to make one for your front lawn.

Need more concrete tips?
All about concrete and more, visit now => http://concrete4home.com/

Wednesday, March 23, 2011

Landscape Edging Ideas

There are many beautiful ways to add some finishing touches to your landscaping and gardening projects, and putting in landscape edging is just one way to give your yard a finished, polished, and professional look. So let's review some great landscape edging ideas that are simple and easy to put into place almost anywhere.

1. Wood Landscape Edging Ideas - There are a variety of wooden landscape edgings that can be purchased at any home and garden store, hardware store, or regular discount stores such as Walmart or Kmart too. You can buy standard two by four or six by four wood pieces and cut them to size, or buy small round pieces of wood which look like miniature tree trunks.

When using wood landscape edging, make it decorative by varying the heights and sizes of wood pieces. If for instance, you're using the round wood pieces, put a 6 inch one in place, then a 4 inch high piece next to that, then a 2 inch high piece, then another 4 inch piece, then another 6 inch piece. Repeat this pattern around the edge of your landscaped areas.

Railroad ties are another excellent way to create wooden landscaping edges, and sometimes these can be picked up at no cost from a variety of job sites in your local area.

One of my favorite ideas for wooden landscape edging, is to use long and unusual looking branches from trees or bushes. Sometimes you'll find fallen tree branches that have unusual shapes and textures, and these can make wonderful borders and edges for your landscaping projects.

2. Stone Landscape Edging Ideas - Using stone to create your landscape edges gives you a lot of variety, style, and freedom for creativity. You could go for a hike for instance, and collect stones in a variety of sizes to take home with you. Check to be sure this is legal where you live first though. Or you could go to a local nursery or home and garden center, and select a variety of stone sizes.

Set the stones up side by side in an attractive pattern, or place them several inches to several feet apart. Alternatively, put large stones a few feet apart, with smaller ones side by side between them.

Many decorative pathway style stones can also be bought almost anywhere. These are designed to be laid flat to create walkways with, but they make beautiful landscape edges and borders too. Simply turn them on their side, and bury them into the ground about 1/4 to 1/3 of the way so they're standing upright. This is even prettier when you plant some annual colorful flowers, such as pansies or vincas in front of each stone.

Concrete and brick are similar but alternative options to using actual stone. Using these also gives you a wide variety of decorative patterns that will make your landscape edging stand out from the crowd.
Add caption
3. Plastic Landscape Edging Ideas - There are many different styles of inexpensive landscape edging materials made from plastic, and available at almost any store. Some of these are designed to look like small picket fences, while others are meant to look like cobblestone, brick, or wood borders themselves.

All it takes is a little bit of thought and creativity, plus a trip or two to browse some of the materials available at your local garden center, and you'll soon be bursting with your own unique landscape edging ideas!

For more Landscape edging ideas please visit http://www.landscaping.gardenbot.com/

Tuesday, March 22, 2011

Landscape Edging Options

A landscape project requires some type of landscape edging. This helps to define the areas of landscaping, such as flower beds and helps to keep grass and weeds from growing into the flower bed. It also helps to keep mulch or other mediums inside the landscaping area. Landscape edging comes in many types and a person can choose based upon their needs and budget.

The simplest and cheapest method of landscape edging is to simple cut in the edge. This is done with a spade or edging tool. A person simply cuts along the edge of the landscape area to make a defined edge that cuts off the bed from the grass or other area. The main issue with this type of edging is that it must be periodically done to ensure it stays well defined. That is why many people choose to use some type of landscape edging material.

There are a variety of edging materials that a person can choose from. The main differences between each edging material is the cost and time to install. There is also the special considerations of each material type. Wood edging comes in an array of types. There are ready made pieces that are already shaped and cut to fit any bed type. Other pieces, like 2x4's, can also be used to make edging. The wood should be treated so it is weather resistant and does not rot. Wood edging can take time to shape and secure together. Plastic edging is another inexpensive method.

There are many styles of plastic edging and it is easy to form around rounded beds. Plastic edging is usually easily snapped together. Metal edging can be expensive, but is what most professionals use. It is long lasting and can be used for round and straight edges, easily. Metal edging usually comes with clips that are easy to use to secure each piece together. Stone edging is another costly edging material. Stones can be easily used for round or straight beds. They last even longer than metal edgings, though. The biggest issue with stone edging is that it allows for grass and weeds to grow between each piece.

Landscape edging adds a nice look to a landscape project. It helps to define and protect beds. Edging helps to keep a crisp, clean looking bed. In some situations, like landscaping done near a pond, edging can help to prevent the erosion of the soil. There are edging choices for any budget and any type of project. Besides the cost it is also wise for a person to consider that some methods may take longer to install. Whatever method a person chooses they are sure to find that it adds definition to their landscaping project.

Yardist.com is an online Landscaping Information Center. The site is filled with landscaping ideas to help you make the most of your landscaping or gardening projects. The site offers information covering a variety of landscaping topics from design and building to maintenance. Subjects include gardening, landscape designs, plants, soil, pest control, construction, tools, and other pertinent content.

LinkWithin

Related Posts Plugin for WordPress, Blogger...